How to Upload Stock Footage to Shutterstock
It is quite piece of cake to start selling your photos on Shutterstock. In fact, the whole procedure might take y'all only few minutes if you know what to do. Hither are the steps:
- Register as a contributor
- Add together metadata to your photo
- Upload your photo to Shutterstock
- Submit your photo for review
This weblog postal service covers photo upload and submission procedure and we assume yous are already a contributor on Shutterstock. If not, go to registration folio and consummate the process. You can check Shutterstock registration guide that might assistance you with the registration.
Photo requirements on Shutterstock
Shutterstock has quite specific requirements to what y'all may or may not sell.
Here are some of them with regards to photography:
- Yous own full copyright for the photo
- Photo is in JPG or TIFF format without layers
- Photo dimensions should exist of minimum 4MP (megapixels)
- File size should not exceed 50MB (megabytes)
Please note the difference between megabytes (file size) and megapixels (image dimensions), some contributors go hands confused past them. To calculate your photo megapixels, you should multiply photograph width by height.
Another of import note hither is about copyright. All microstocks require that you lot ain or control copyright of the content you upload. You cannot submit photos made by other people, images from the internet etc. If your photo contains recognizable people, y'all must also provide Model Release or Belongings Release which are legal documents where copyright holders or recognizable people requite their consent for submitting your photo to Shutterstock.
What is metadata
All photos on Shutterstock have Keywords and Description that aid customers to observe them using search. Keywords and Description are also referred to as Metadata (that is, data about data).
You can attach metadata to photos in one of the two ways:
- If you sell but on Shutterstock and so you lot can upload your files first and add metadata on Shutterstock Contributor portal.
- If you plan to sell on more than one microstock website (eastward.chiliad. Adobe Stock or Depositphotos) then information technology volition be better to add metadata earlier upload.
Usually second option is preferable because you ain everything: photograph and metadata. If yous own photo, but metadata is only on Shutterstock, information technology may create you impediments in future if you lot will desire to use other microstocks too.
Adding metadata to photos in Xpiks
Open Xpiks and add together your photos in that location. The easiest is to drag'n'drop them into Xpiks.
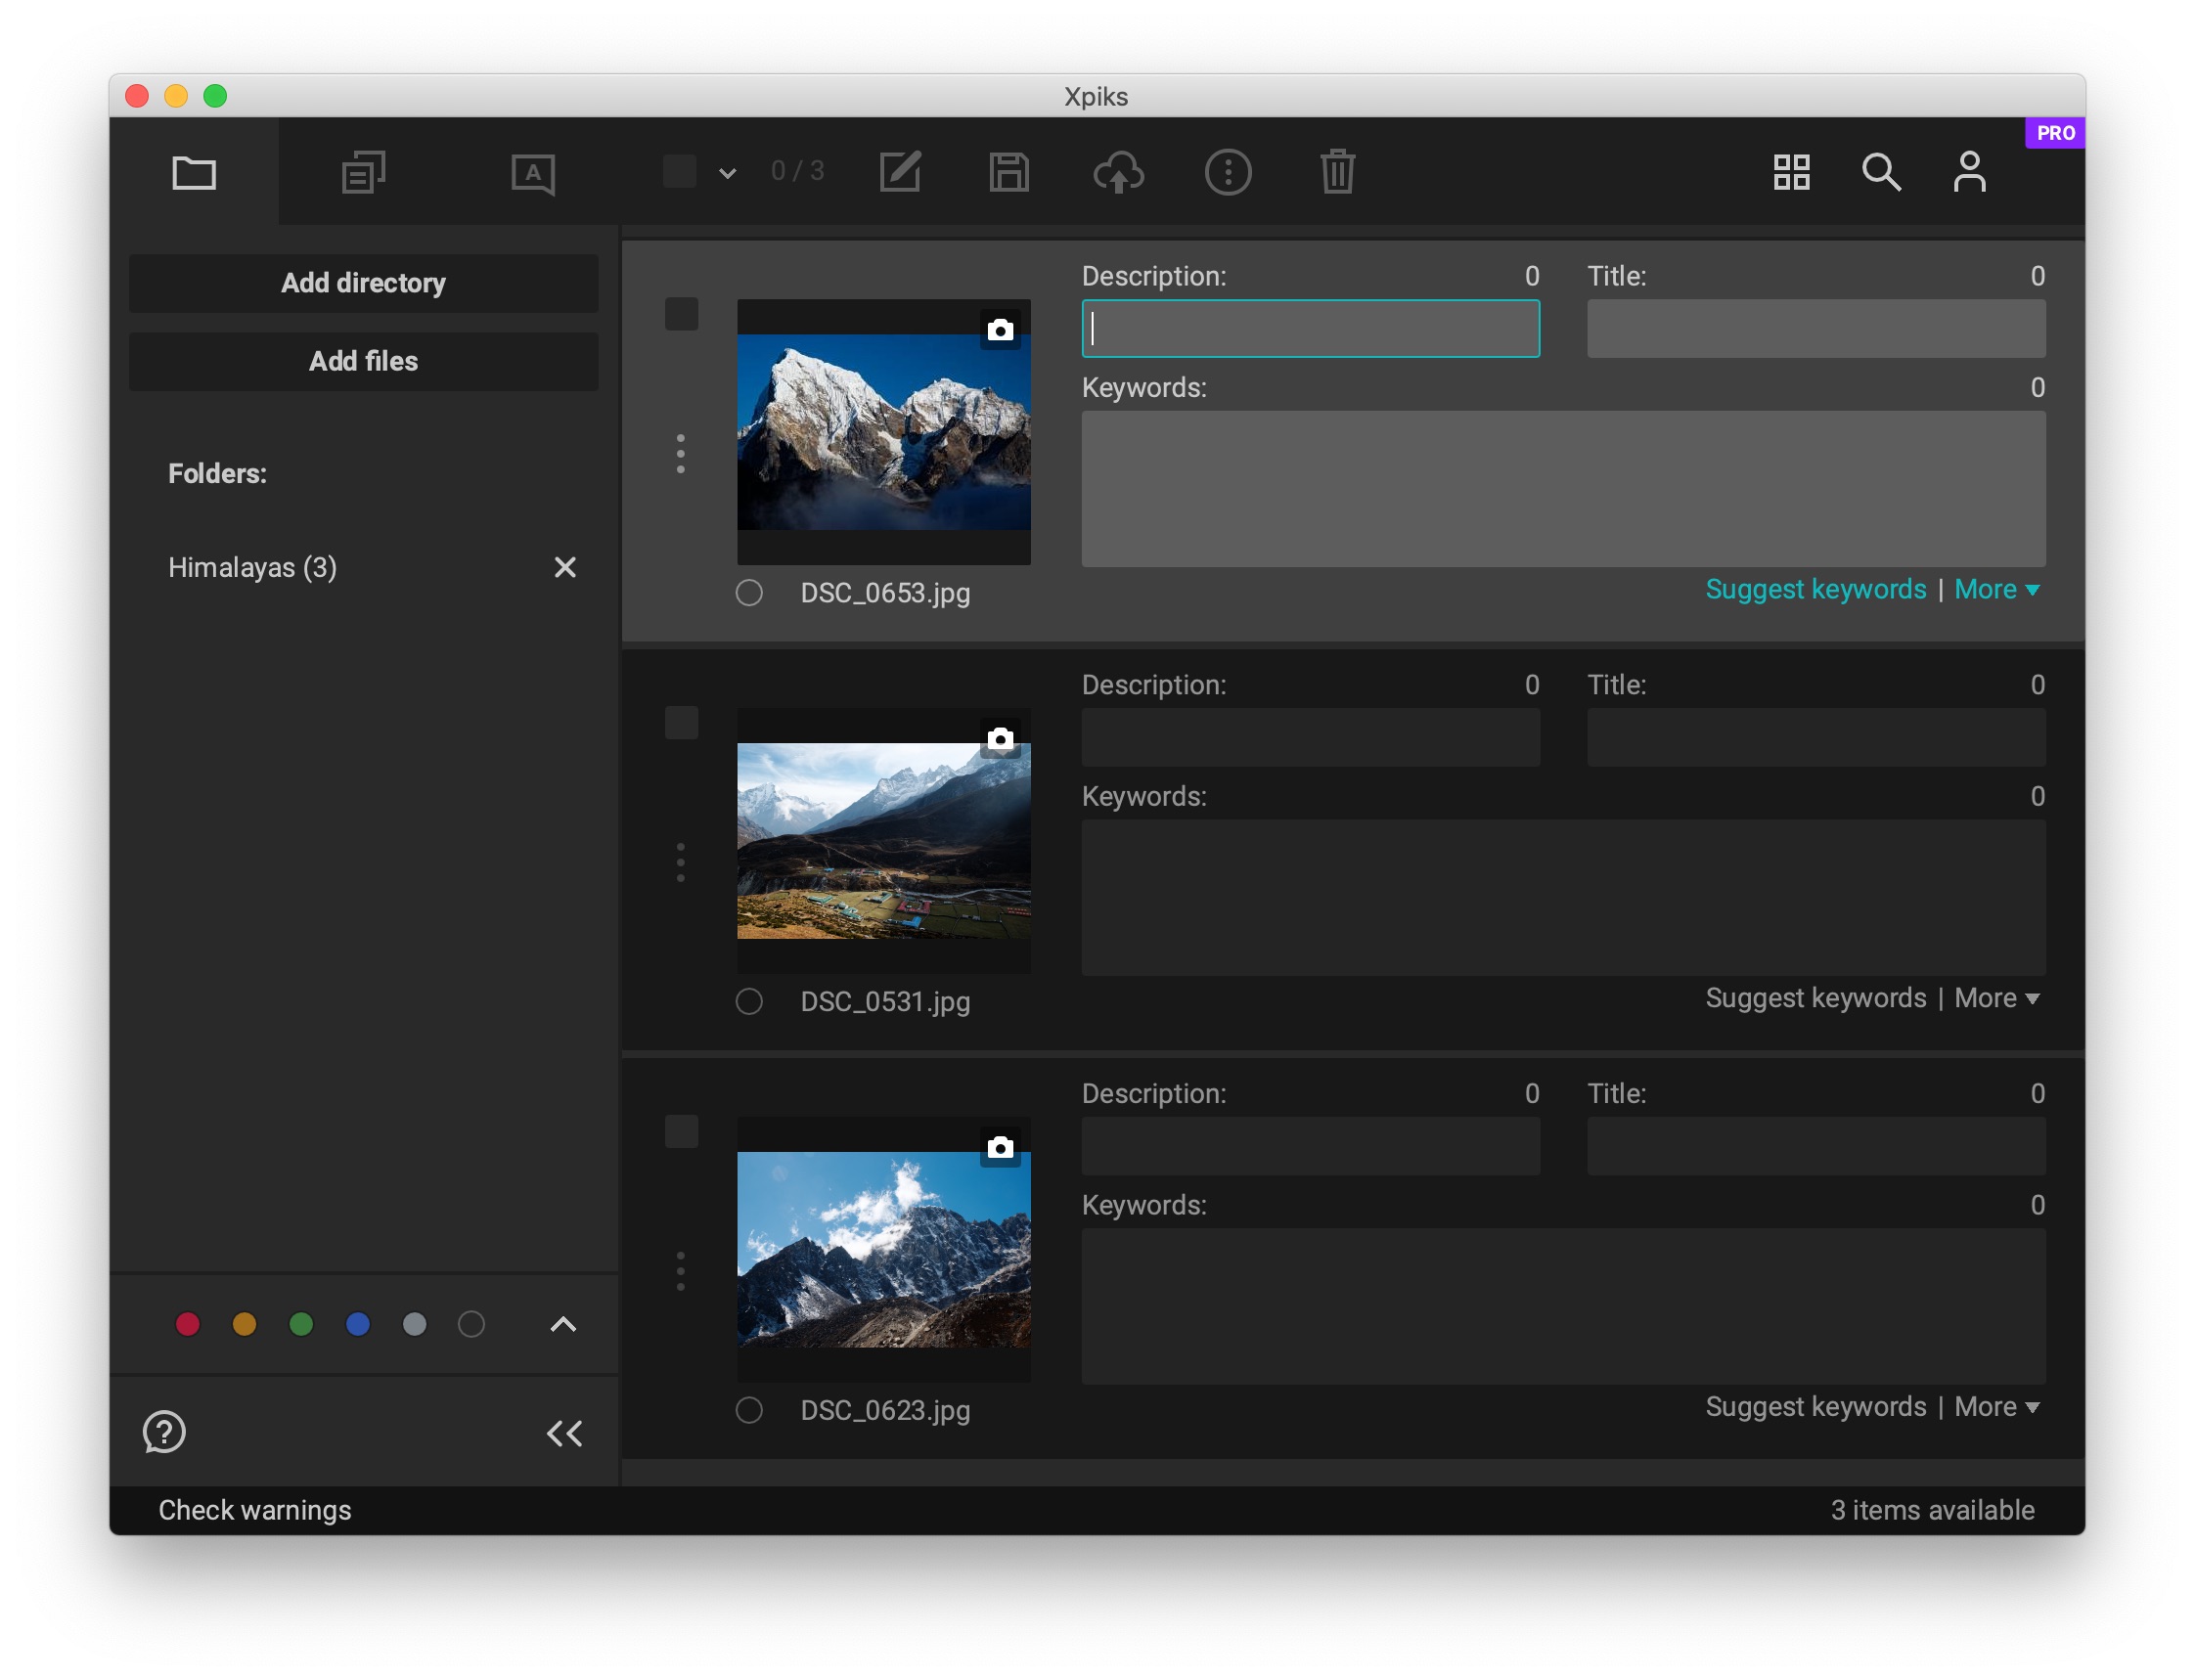
At present you need to enter Description, Title and Keywords to each photo. It is easier to do information technology if you open each photo separately: only double click on the thumbnail. Xpiks can aid yous with keywords by providing Keywords Suggestions. Shutterstock does non require Title metadata, but you may add it at present since other microstocks like Adobe Stock need it.
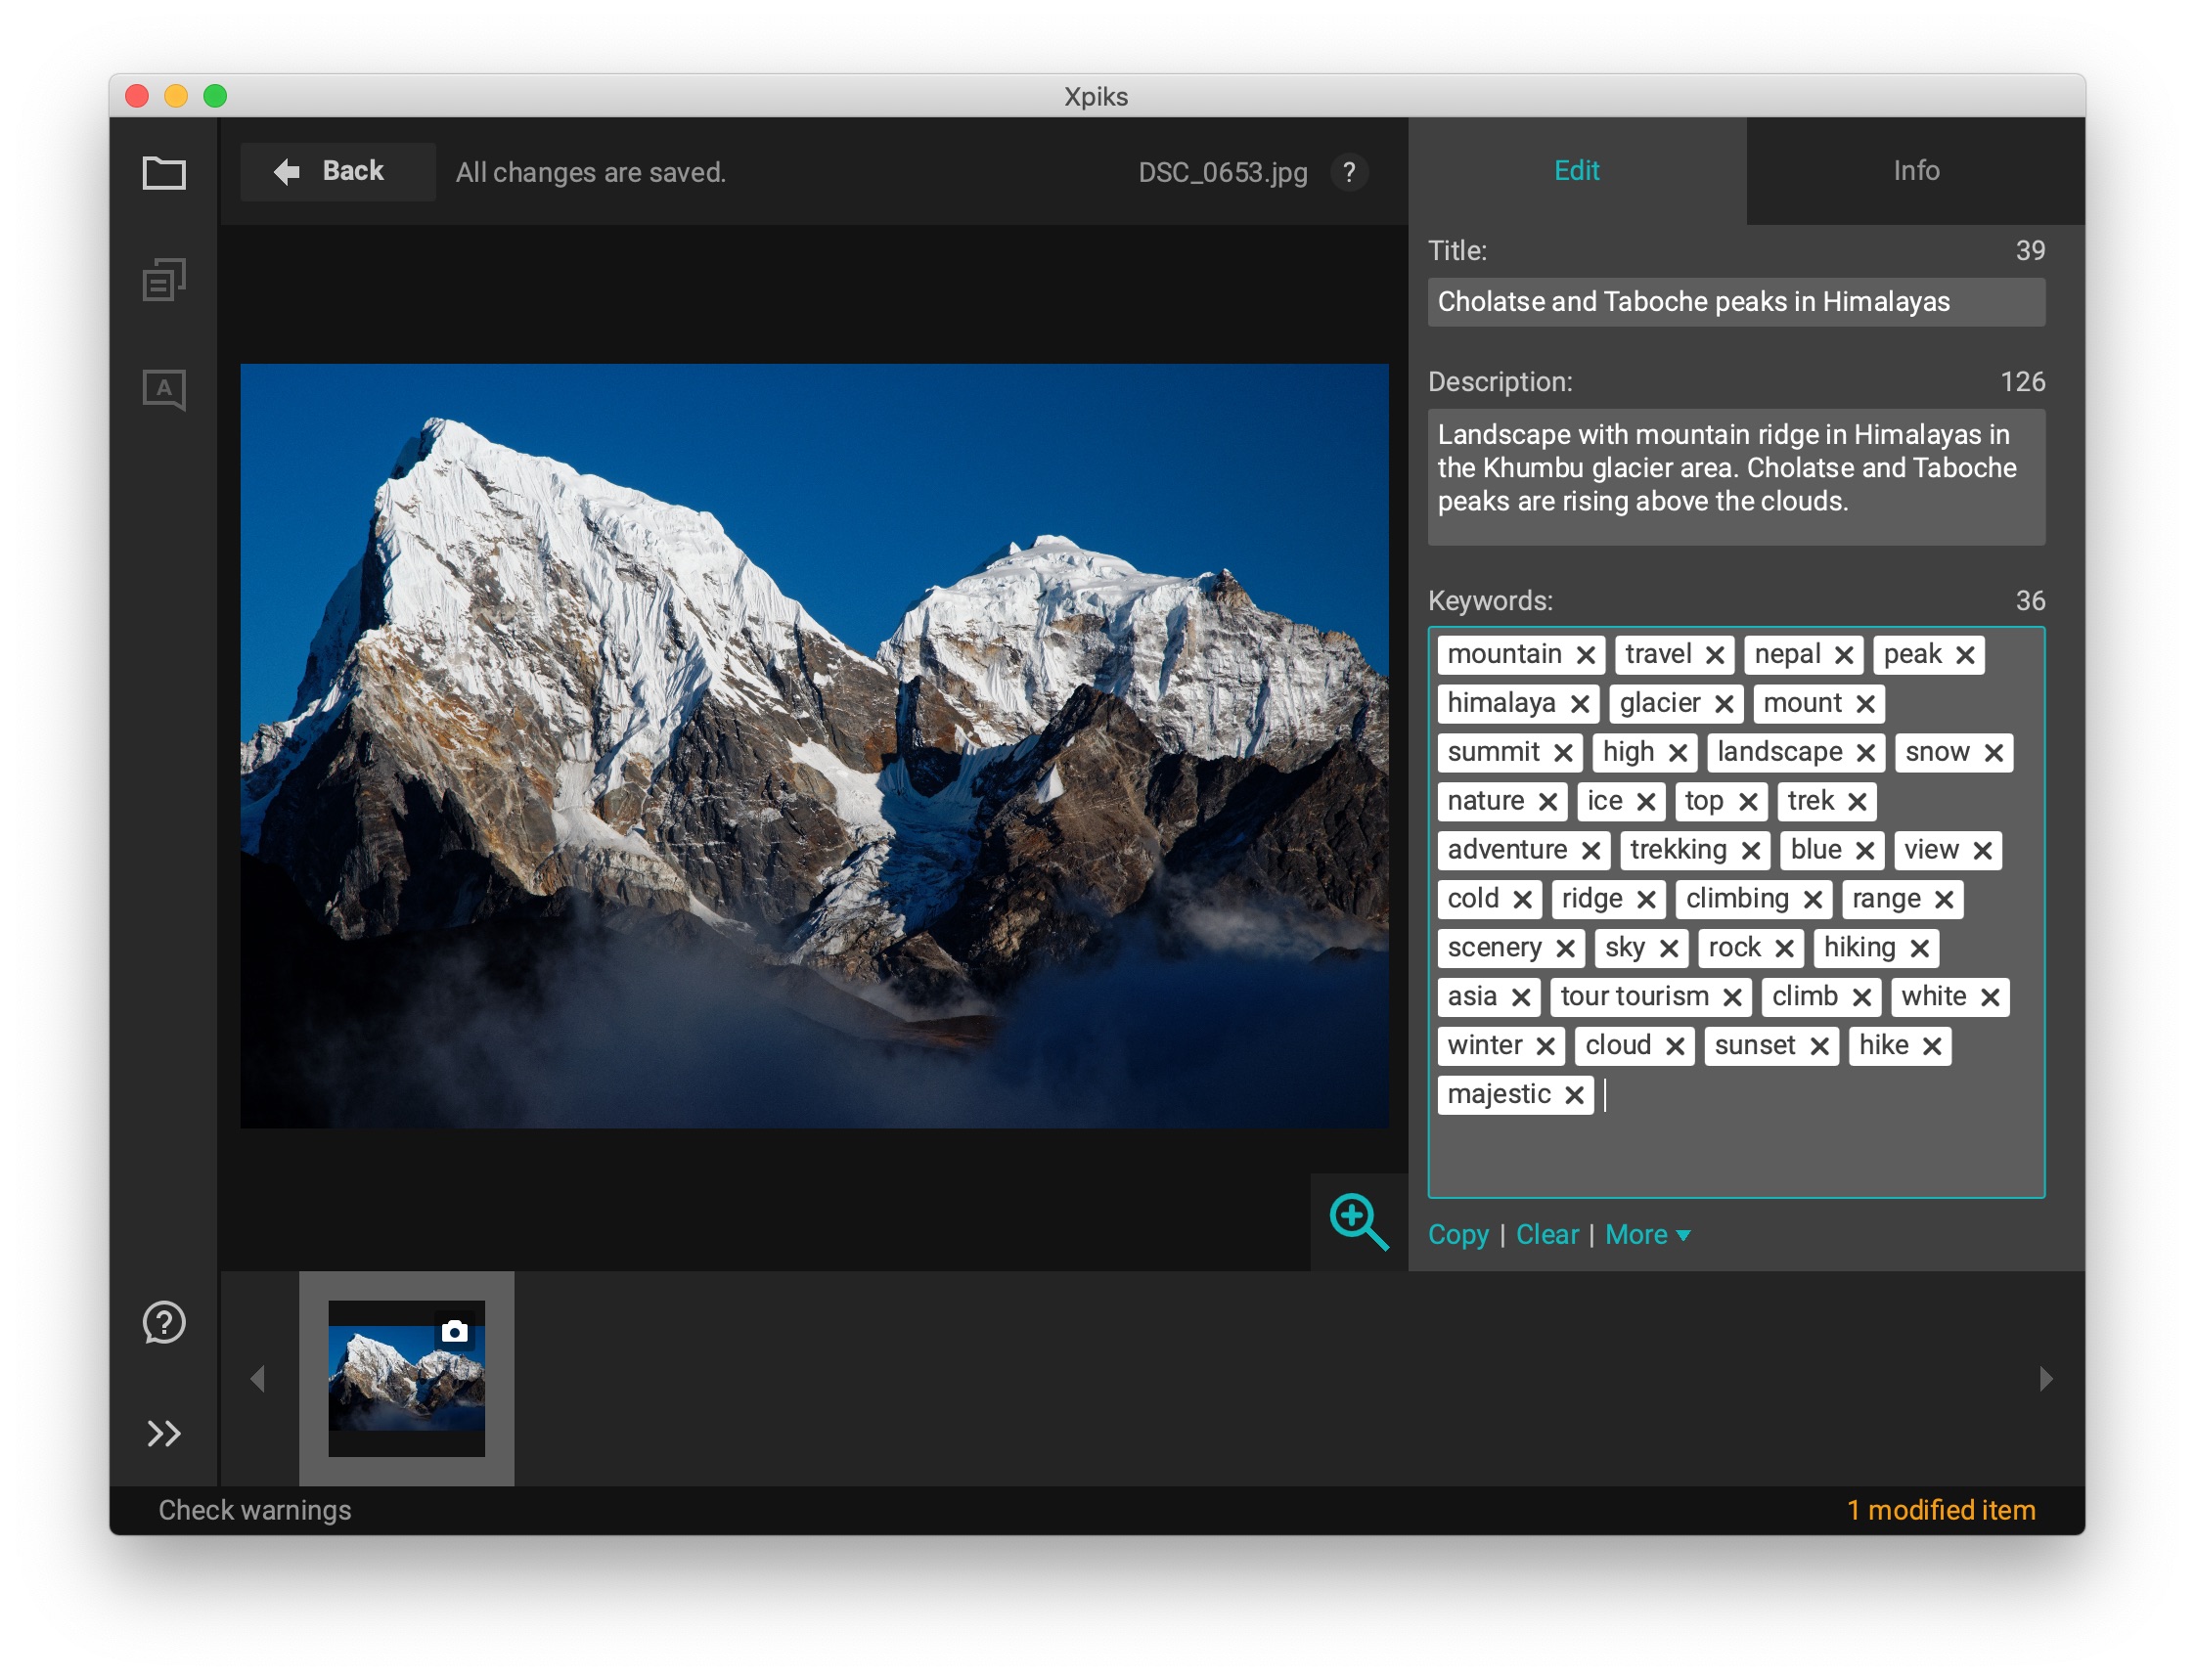
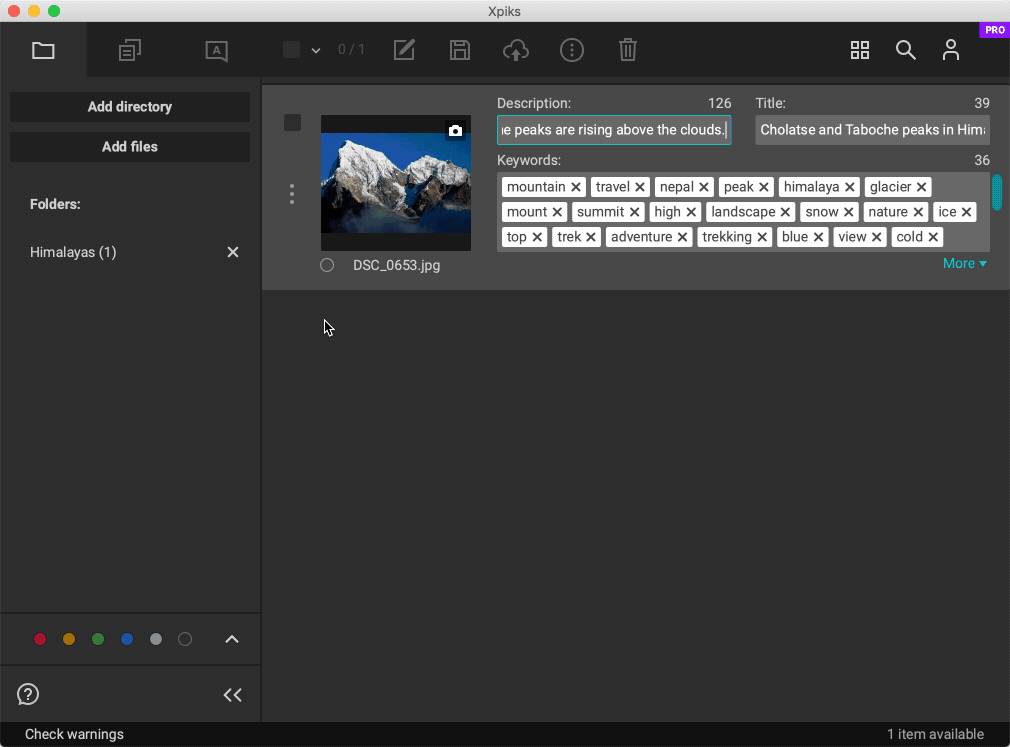
After you are done with editing metadata, select all files and save them. Saving attaches Description and Keywords that yous just entered to the bodily file on your disk. Subsequently information technology is attached to the file, Shutterstock will exist able to read it after you upload the file.
Upload photos to Shutterstock
There are two ways to upload your photos:
- browser upload, suitable for pocket-sized amount of files being uploaded
- upload via FTP, suitable for many files or simultaneous upload to many websites
FTP (File Transfer Protocol) is ane of the means of communication over the internet (e.chiliad. just similar y'all use HTTP protocol via your browser to read this folio). Software that can speak FTP is commonly chosen "FTP client". Some examples are FileZilla and Cyberduck.
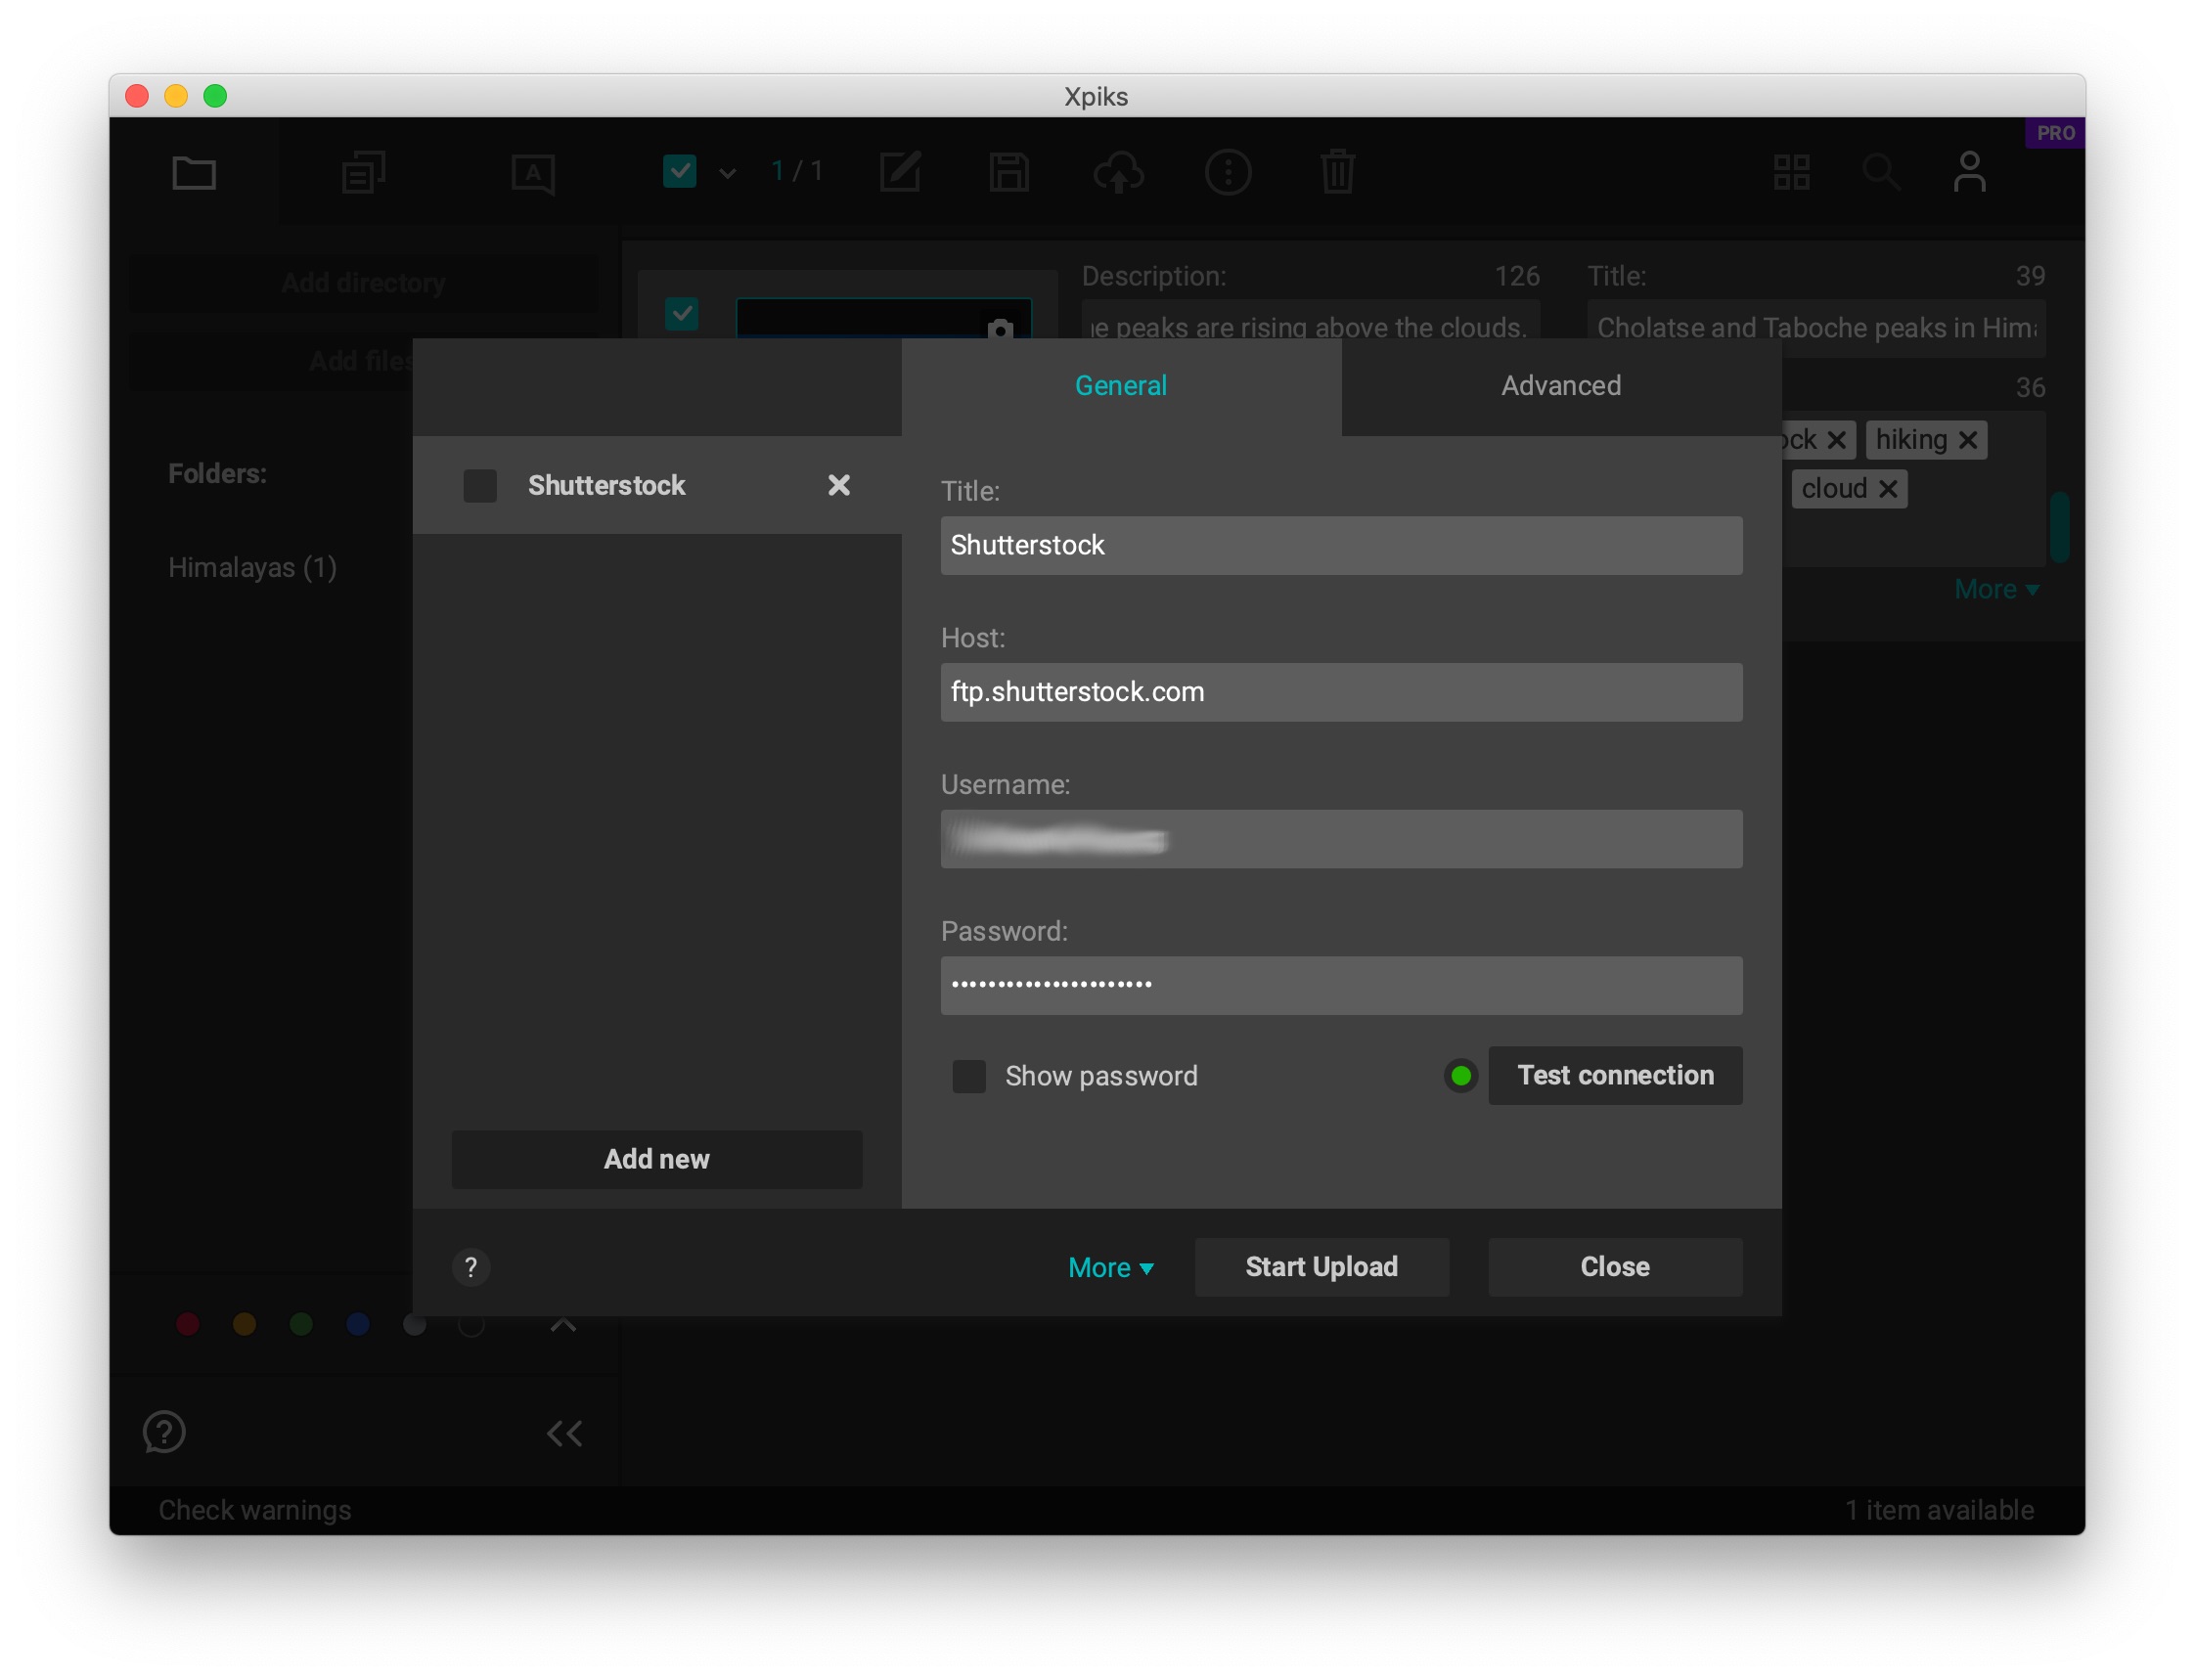
Luckily you lot can upload photos correct from Xpiks, because Xpiks is likewise an FTP client. Just select the files and click "Upload".
Here you need to enter your username and password that yous use to login to the website. Then press "Examination connection" push: if you configured everything correctly, it will turn greenish. Afterward you are ready, printing "First upload".
Submit for review
After upload finishes you tin head over to Shutterstock Contributor Portal (y'all can select in menu "Portfolio -> Submit content") and see your files there.
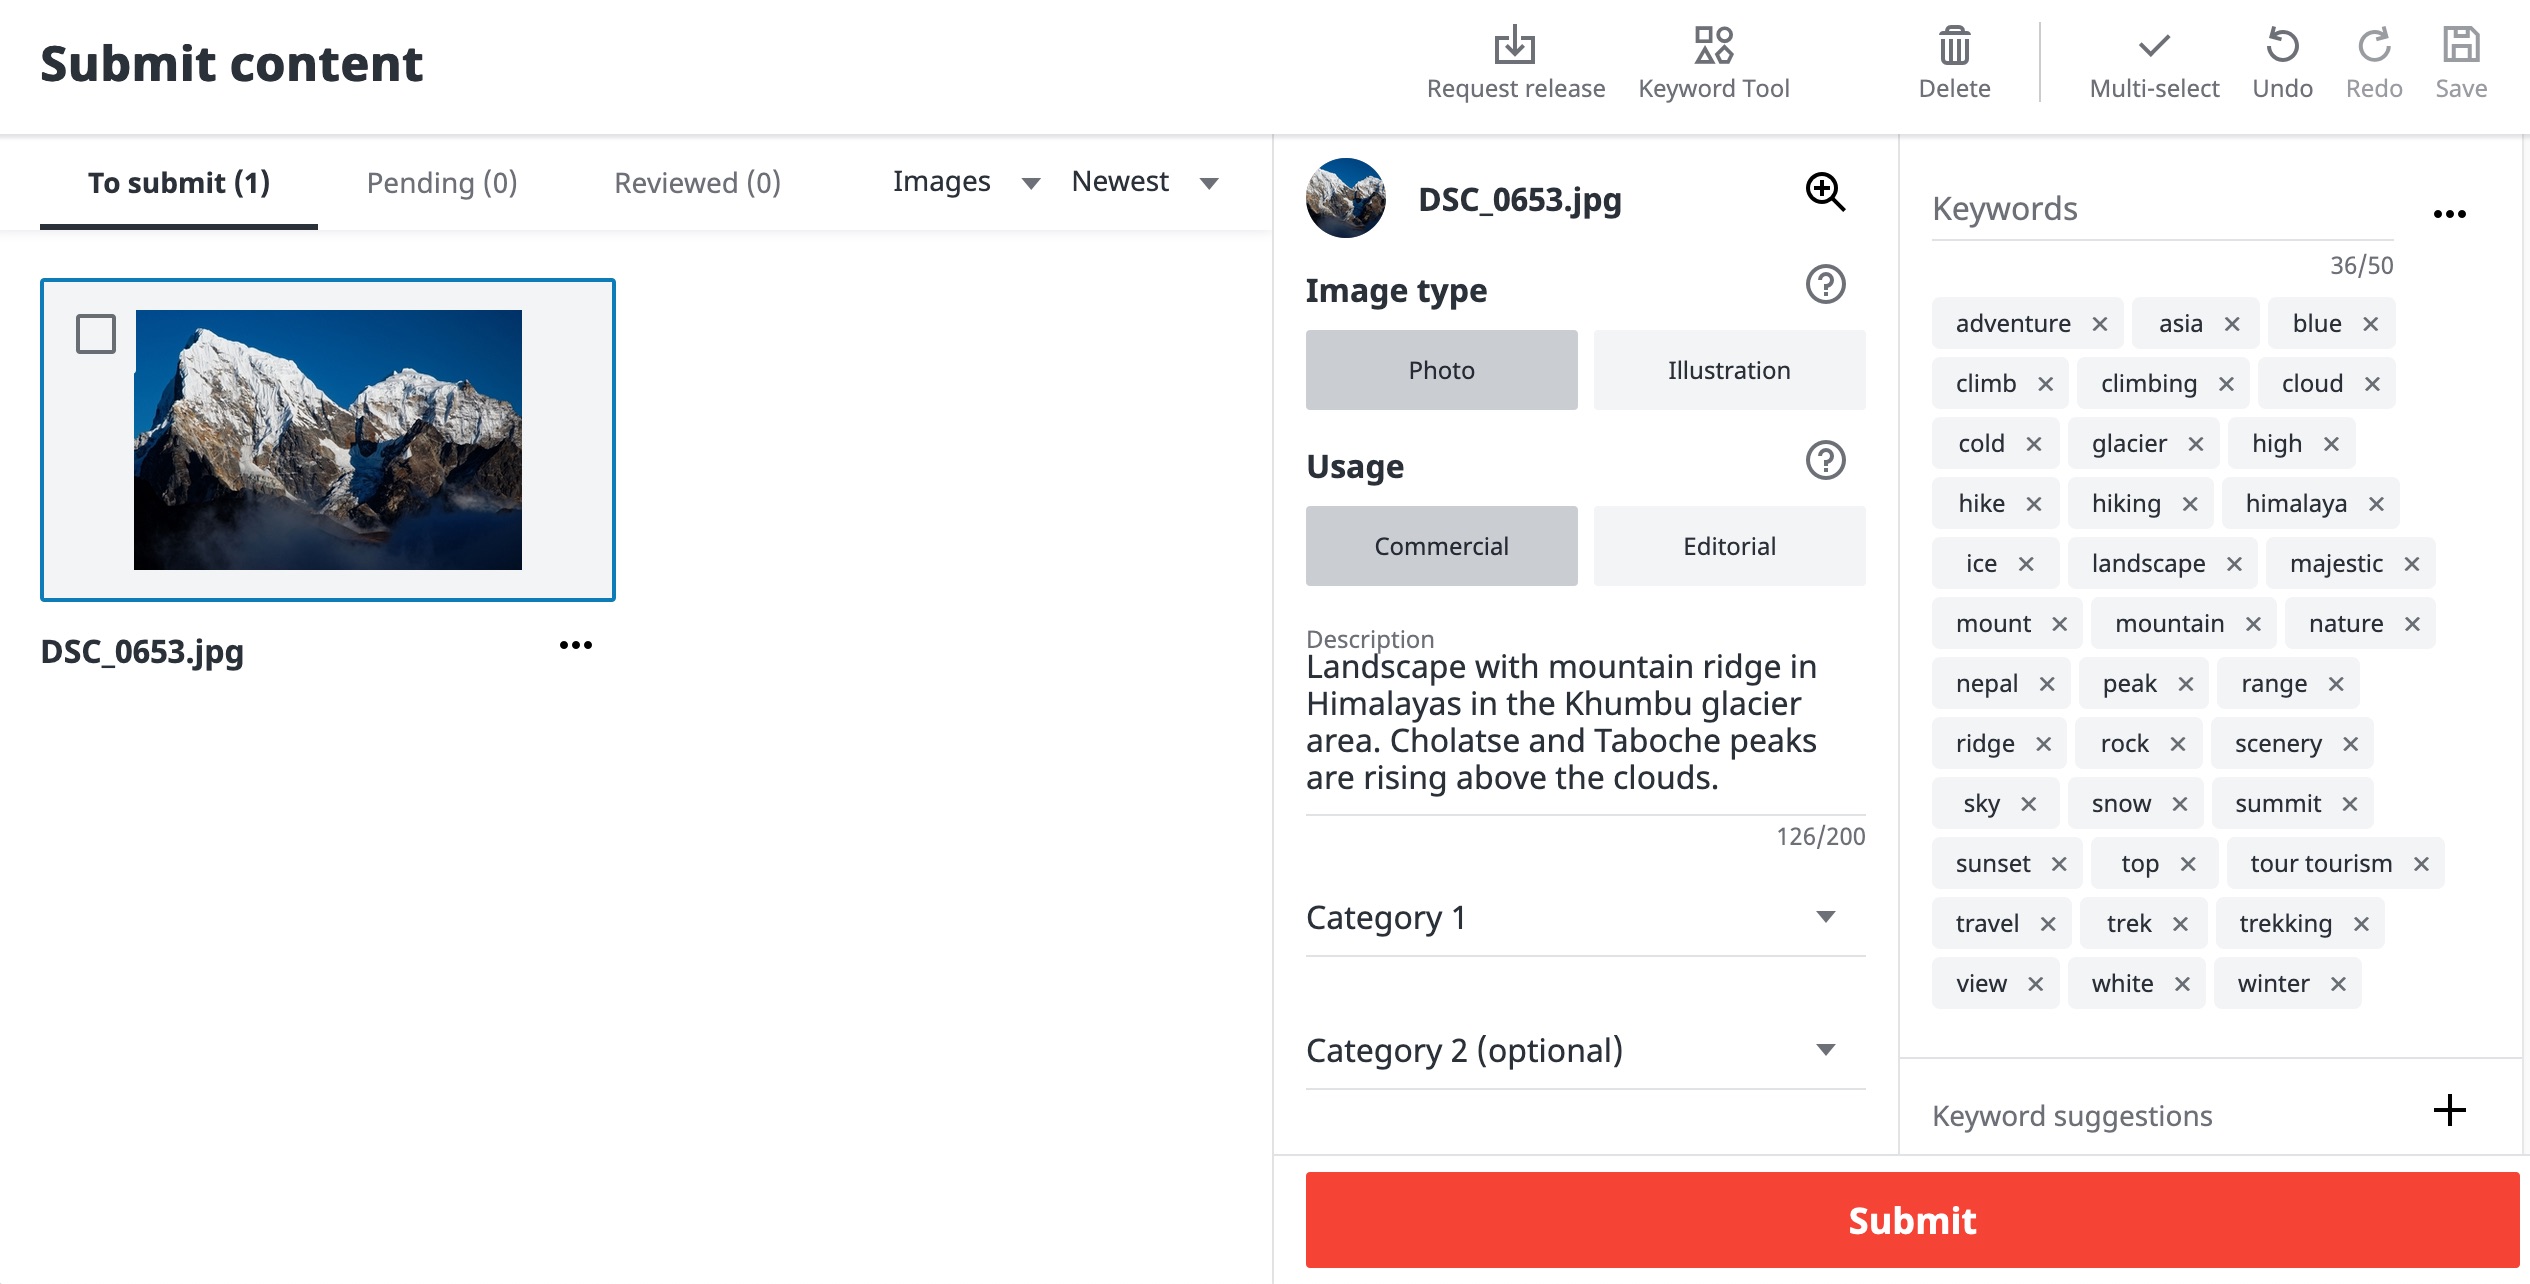
As you might have noted, the files incorporate Description and Keywords that you accept previously entered in Xpiks. At present you demand to select a category for the photo. In this case the most appropriate volition be just "Nature".
After you are done, press "Submit" button. Your files will exist added to the review queue and yous will receive an email when your photos will get reviewed by Shutterstock inspectors. If your photos will be accepted, they go available for customers to purchase immediately. Otherwise yous will receive a rejection reason in the response and you volition have a chance to fix the mistakes and resubmit.
Useful links
- Tutorial about basic FTP upload
- Shutterstock help on photo submission
- Ultimate contributor'southward guide to Shutterstock
Source: https://xpiksapp.com/blog/upload-photo-shutterstock/
0 Response to "How to Upload Stock Footage to Shutterstock"
Post a Comment